Personalizing Your Child's Bedroom: DIY Wall Art Ideas
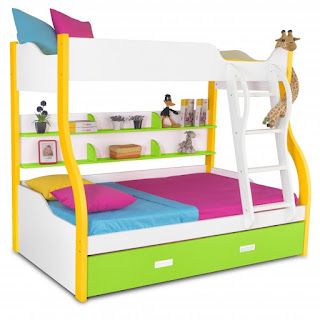
When it comes to decorating your child's bedroom, the options are endless. With a little creativity and some DIY spirit, you can transform their space into a magical, personalized haven. Not only does this approach make their room unique, but it also allows you to bond with your child as you create something special together. In this blog post, we'll explore some fantastic DIY wall art ideas that will enhance your kids' room decor and complement their kids' room furniture from Alex Daisy.
Why DIY Wall Art?
DIY wall art is an excellent way to add a personal touch to your child's bedroom. It's affordable, customizable, and fun to make. Plus, it allows Kids room furniture to portray your child's personality and interests. Whether your little one loves animals, space, or fairy tales, you can create wall art that reflects their passions.
Getting Started: Supplies You'll Need
Before diving into our DIY wall art projects, let's gather some basic supplies:
Canvas or sturdy cardboard
Paints and brushes
Stencils
Glue and scissors
Decorative paper or fabric
Frames (optional)
Adhesive hooks or nails for hanging
Having these supplies on hand will make the process smoother and more enjoyable.
1. Handprint Art
One of the simplest yet most heartfelt DIY wall art ideas is handprint art. This project is perfect for young children and can become a treasured keepsake as they grow.
Instructions:
1. Choose a Canvas: Pick a canvas size that fits the wall space you have in mind.
2. Select Paint Colors: Let your child choose their favorite colors. Non-toxic, washable paints are best.
3. Create Handprints: Dip your child's hand in the paint and press it onto the canvas. You can create patterns, shapes, or even animals by arranging the handprints creatively.
4. Personalize It: Add your child's name and the date to remember when it was made.
This project is simple yet meaningful, and it will add a vibrant splash of color to the room.
2. Collage Wall Art
Collages are a fantastic way to incorporate a mix of images, textures, and colors into your kids room decor. It's also a great way to recycle old magazines, wrapping paper, or fabric scraps.
Instructions:
1. Gather Materials: Collect magazines, colored paper, fabric pieces, stickers, and any other decorative items.
2. Cut and Arrange: Cut out interesting shapes, pictures, and patterns. Arrange them on a canvas or sturdy cardboard until you're happy with the design.
3. Glue Everything: Once you're satisfied with the layout, glue the pieces in place.
4. Frame It: For a polished look, consider framing the collage.
This project encourages creativity and allows your child to have a hand in designing their wall art.
3. Alphabet Wall
Creating an alphabet wall is not only decorative but also educational. This project can help your child learn letters and improve their reading skills.
Instructions:
1. Choose a Theme: Decide whether you want a colorful, whimsical alphabet or a more modern, minimalist look.
2. Create Letters: Cut out large letters from cardboard or buy pre-cut wooden or foam letters.
3. Decorate: Paint the letters or cover them with decorative paper or fabric.
4. Arrange and Hang: Arrange the letters on the wall in a grid or a more random pattern. Use adhesive hooks or nails to hang them.
This project is versatile and can grow with your child as they learn and develop.
4. Fairy Tale Silhouettes
For children who love fairy tales, creating silhouette wall art can be enchanting. This project can bring their favorite stories to life right in their bedroom.
Instructions:
1. Choose Characters: Pick silhouettes of their favorite fairy tale characters, such as dragons, princesses, or castles.
2. Create Stencils: Print out the silhouettes and use them as stencils on black paper or cardboard.
3. Cut Out and Paint: Cut out the silhouettes and paint them in black or another color of your choice.
4. Mount on Canvas: Glue the silhouettes onto a contrasting background canvas.
5. Hang on the Wall: Use adhesive hooks to display the finished pieces.
This type of wall art adds a touch of magic and can inspire your child's imagination.
5. Nature-Inspired Art
Bringing elements of nature into your child's room can create a calming and beautiful atmosphere. This project is perfect for kids who love the outdoors.
Instructions:
1. Collect Natural Items: Gather leaves, flowers, twigs, and small stones.
2. Create Prints: Use leaves and flowers to create prints on canvas by painting one side and pressing them onto the surface.
3. Arrange and Glue: Once dry, arrange additional natural items on the canvas and glue them in place.
4. Frame It: For added durability and a finished look, frame the artwork.
This project helps your child appreciate nature and brings a bit of the outdoors inside.
Conclusion
Creating DIY wall art for your child's bedroom is a rewarding and enjoyable experience. It allows you to personalize their space while making lasting memories together. By incorporating these ideas into your kids' room decor, you can complement their kids' room furniture from Alex Daisy and create a unique and vibrant environment. So, gather your supplies and let your creativity flow. Your child's dream bedroom is just a project away!


Comments
Post a Comment